Updated: 21/09/2023
We often get customers asking us for advice on how to hang louvre doors. Whilst there is more than one way to do this, one of the most common ways to hang a louvre door is on hinges. This method is usually adopted by those planning to use their louvre door/s as main room doors, airing cupboard doors or as bathroom doors. If you’re hanging louvre doors for the first time or need some advice before taking the plunge, here’s our step by step guide on how to hang a louvre door using flush hinges.
Tools required
Time
Pilot Drill
Screwdriver
Flush hinges and Screws
Gloves
Tape measure
Spirit level
Small Wedges/Chocks
Pencil
Plane (If need to trim some of the door height or width)
Handles/ hardware
Step One
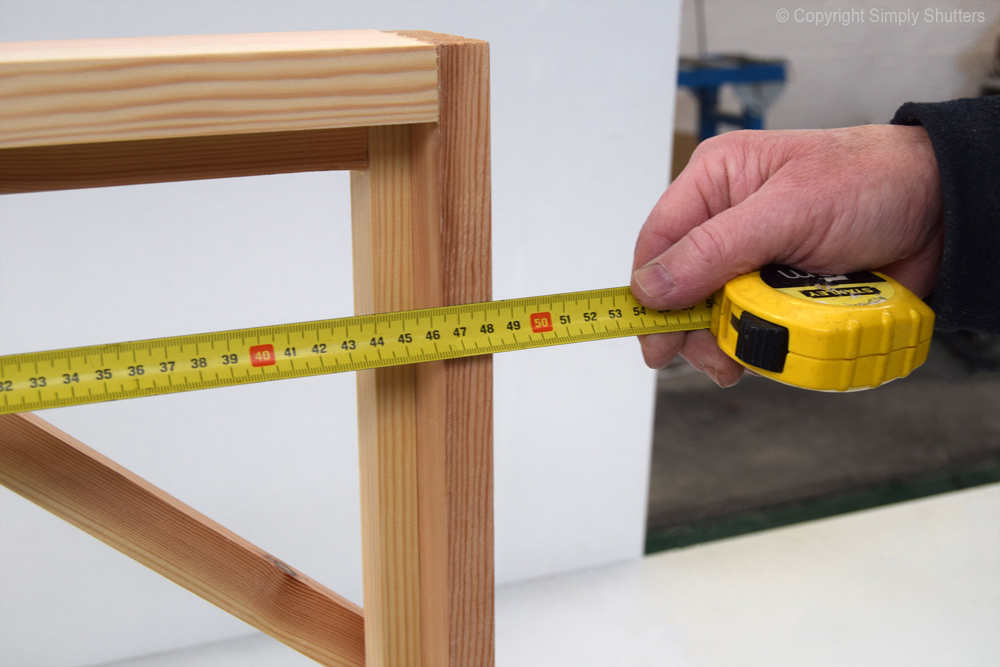
So you have decided to purchase and install a stylish interior louvre door. Your first port of call is to accurately measure the space you are intending to install the door within (the aperture/ opening). For tips on how to measure for an interior louvre door see our article here.
Top tip: When measuring allow a 2-3mm gap all around the door to allow for hinge placement and door movement. It is also important to take into consideration the flooring if you are planning to lay a carpet or other floor covering after installation.
Top Tip: Always reseal any unfinished edges as wood is a fibrous material that is susceptible to moisture and heat.
Step Two
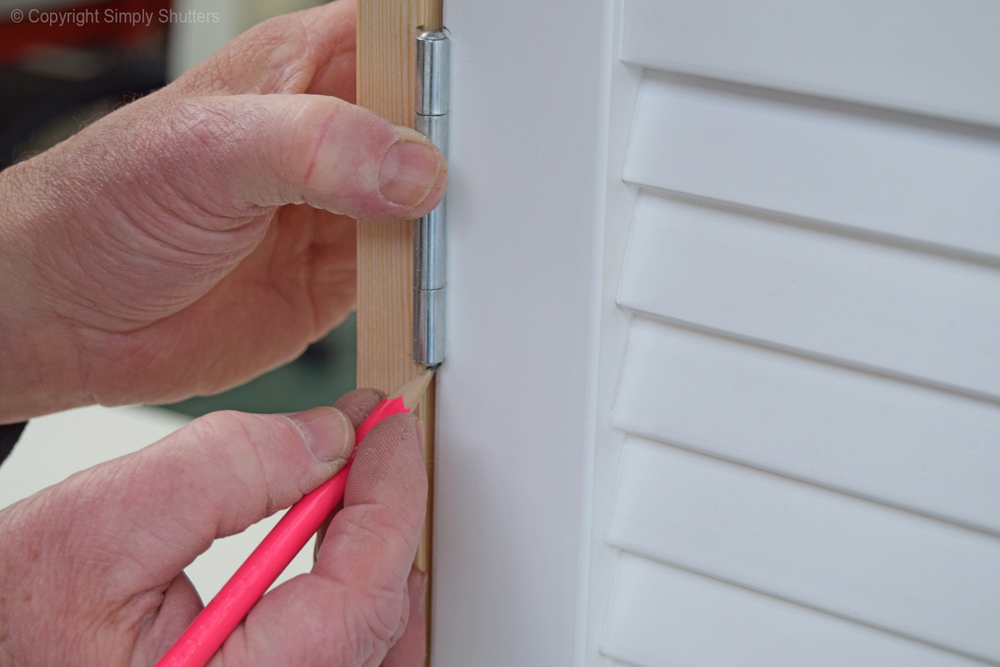
Work out how many hinges you will require to use on the door. Any door that is 150cm or taller will NEED 3 hinges. First mark on the door where you are going to place the hinges and then do the same on the door frame/ aperture.
Top tip: If you are replacing an existing door and the hinges are still in good condition why not use them again on your new door. This is great way to save money. If you are going to do this it is a good idea to check the old hinges are compatible with the new door.
When it comes to door hanging there is a general rule of “6 up” and “9 down”, which refers to hanging hinges 6” down from the top of the door and 9” up from the bottom. For a neater appearance with interior louvre doors we recommend a 6” up and 6” down arrangement.
Top Tip: If adding more than 2 hinges ensure the middle hinge is spaced equally between the top and bottom hinges to ensure the weight of the door is spread evenly. Unevenly spaced hinges can cause the door to bow or warp over time.
Step Three
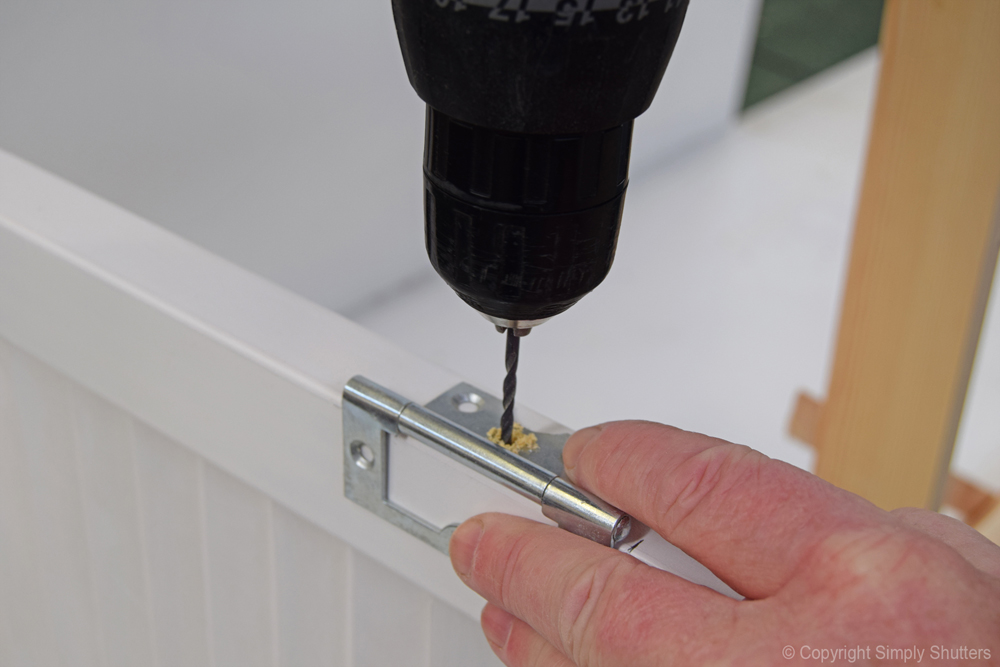
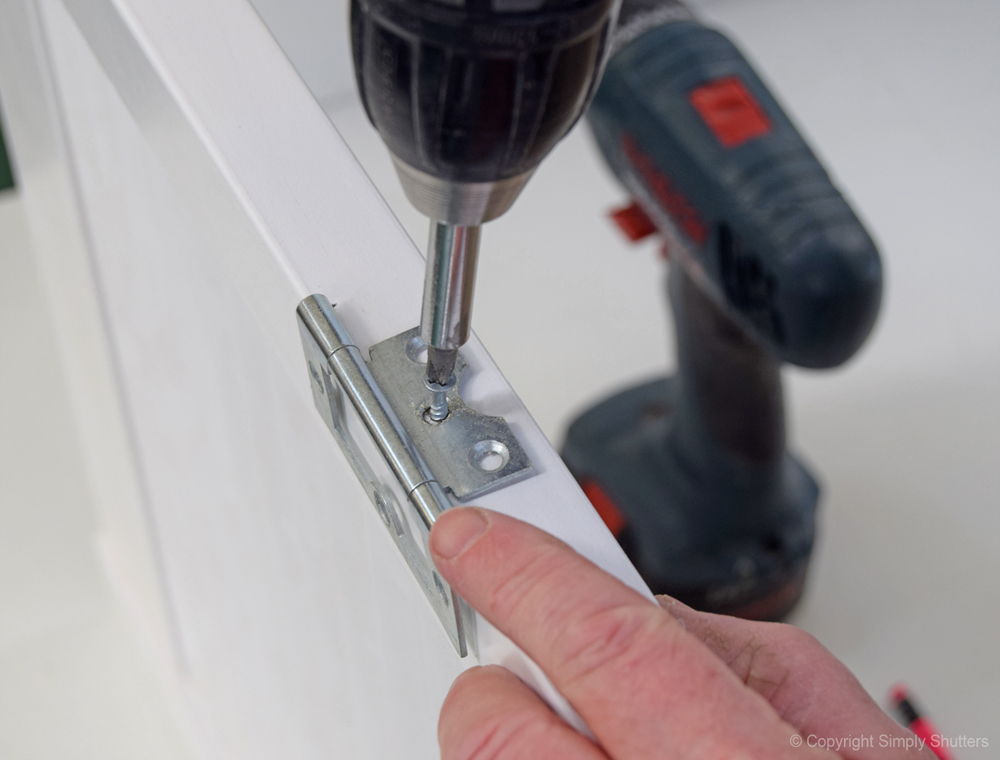
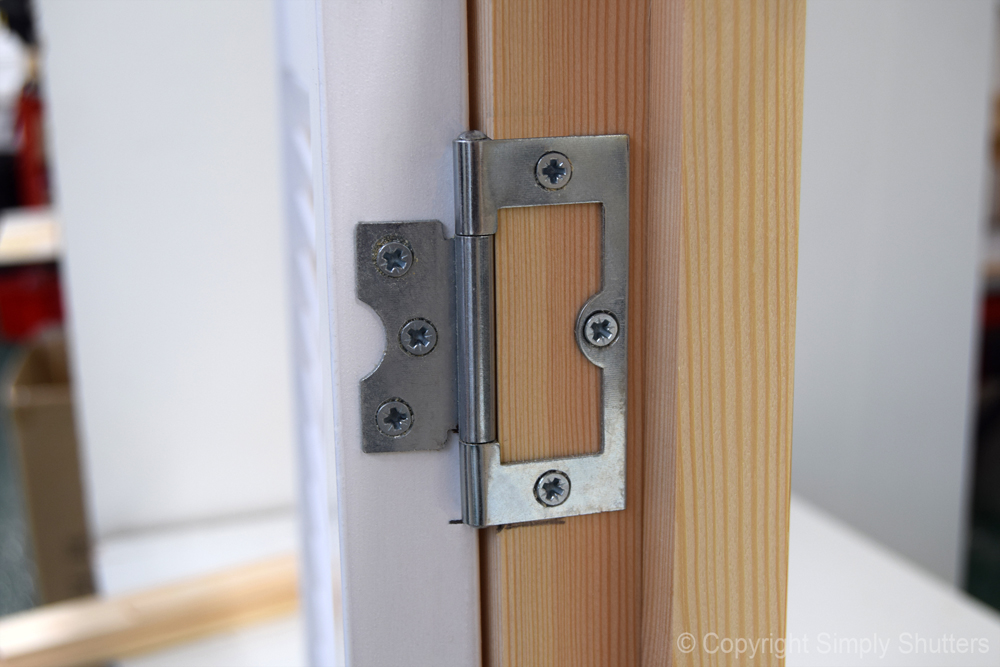
Is it now time to fix the hinges to the door/s. There are various types of hinges available that you can use with your louvre doors. In this article we are going to focus on flush hinges. Whilst there are different variations of flush hinges available the standard feature of a flush hinge is that one leaf interlocks into the other. These hinges are ideal to use on lightweight doors like louvre doors as they are easy to install and save you the time and effort involved in having to rebate/ recess the door frame (stile) to accommodate the hinge.
To attach the hinges to the door place each hinge over the guide marks you made earlier and, using the holes as a guide, use your pilot drill to make pilot holes. You can then secure the hinge in place with screws using your screwdriver. It is important to use a pilot drill first rather than just screwing the screws into place otherwise you could crack the wood.
Top Tip: It is always a good idea to do as much research as possible with regards to the type of hinges required before purchasing. There are various online retailers and hinge specialists who you can approach such as SDS London Ltd.
Step Four
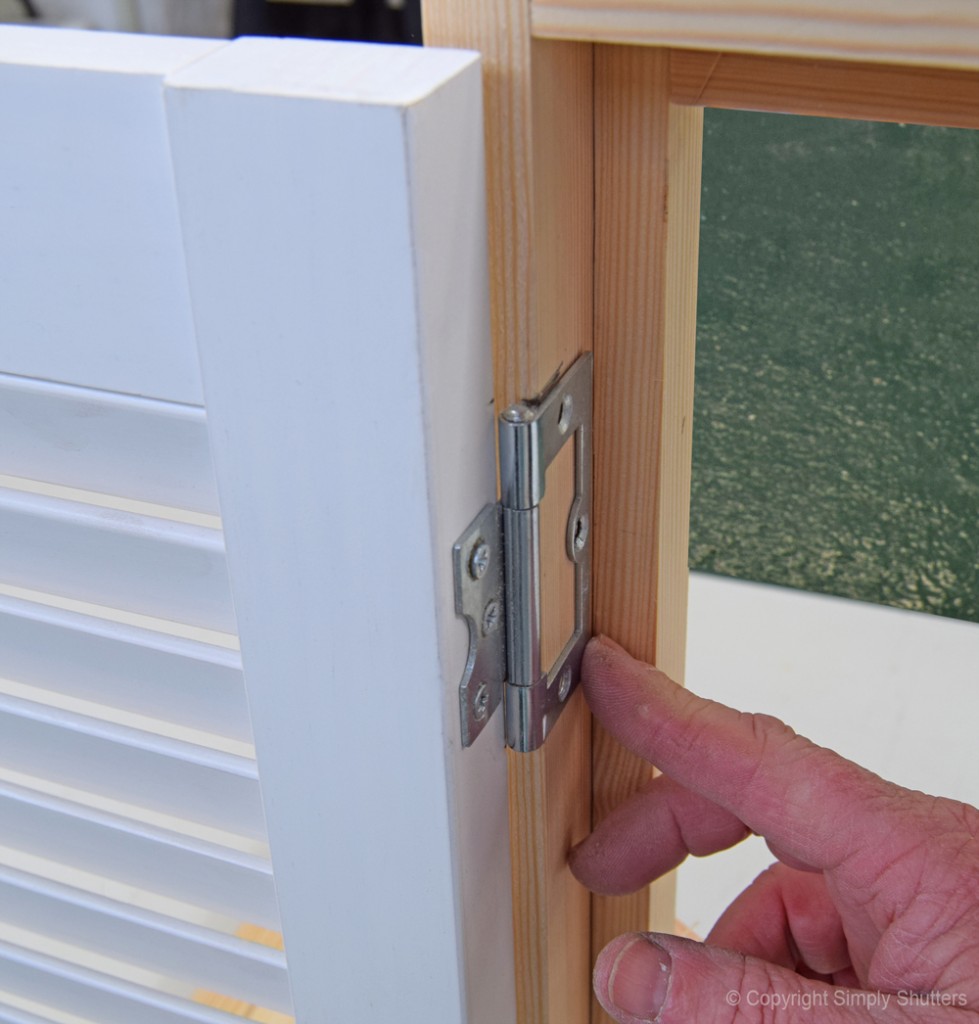
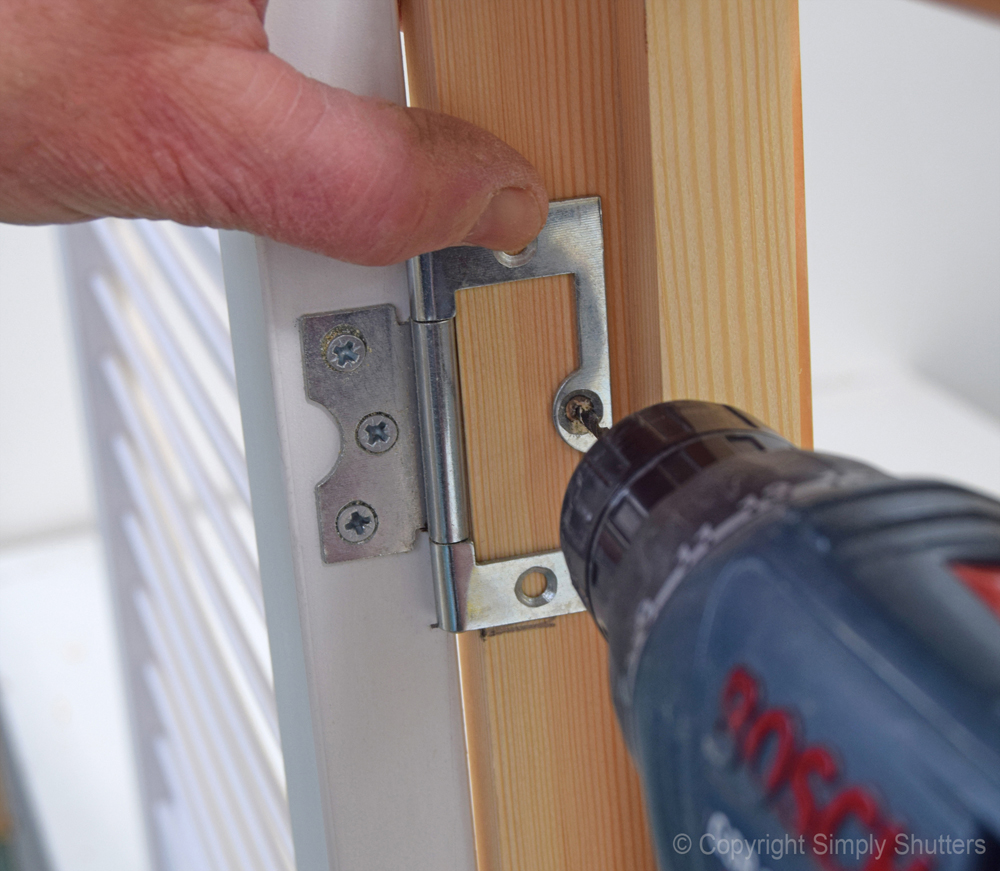
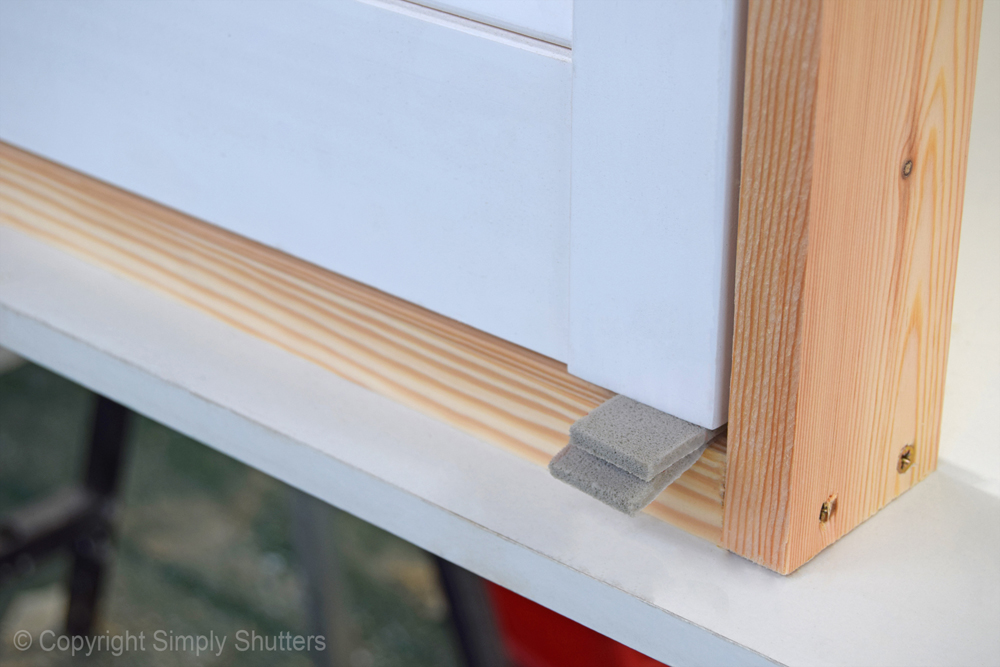
Now is the time to check the level of the door to ensure it is fixed perfectly upright. First hold the door in place up against the side of the door frame (the door jamb) as it would sit when opened. Use small wedges at the bottom of the door and make sure the door is sitting flat against the jamb of the door. A spirit level can be used to ensure the door is level. If you feel happy with the position of the door you can now fix the hinges into place on the aperture, not forgetting to drill your pilot holes first.
Top Tip: Only fix one screw on a hinge at a time as your next step is to make sure your door is level. If it needs adjusting it is a lot easier to remove one screw.
Step Five
Once you have fixed the door into place you can now remove the small wedges from underneath and do a ‘test open and close’. If the door does not look straight, sits strangely or does not open and close with ease this can easily be amended by fixing the wedges back into place and re-levelling. Once adjustments have been made test the door again and once you are fully happy you can secure the hinges. You can now add any additional hardware to your door/s such as catches or handles.
Step Six
Stand back and admire your work!
![]()