Lowest prices guaranteed
 on shutters and louvre doors
 Family run business
 since 1999
 Same day dispatch
 on stock louvre doors
 Buy direct from the UK's
No.1 Manufacturer
Lowest prices guaranteed
Family run business
Same day dispatch
Buy direct from the UK's
Lowest prices guaranteed
Family run business
Same day dispatch
Buy direct from the UK'sTwo styles available
Original
Scalloped
Part Number
MIF2EXDPxxx
MIF2EXDSPxxx
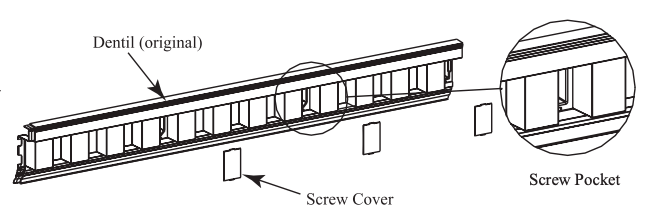
Kit Contains:
8 pcs. Dentil (original or scalloped)
24 pcs. Screw covers
24 screws

-There are three ways to begin the installation of the Exterior Dentil. Depending on the style of house, one or more of these methods will be used. For all three different methods, installation will begin by working from left to right.

Note: The Dentil Corners shown in the illustrations are sold separately.
Step 1
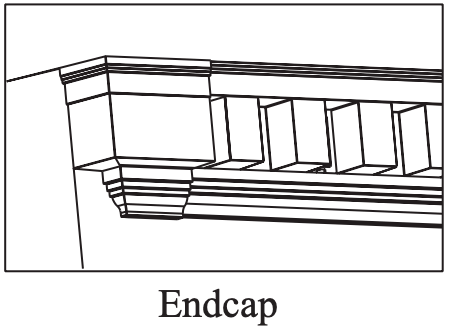
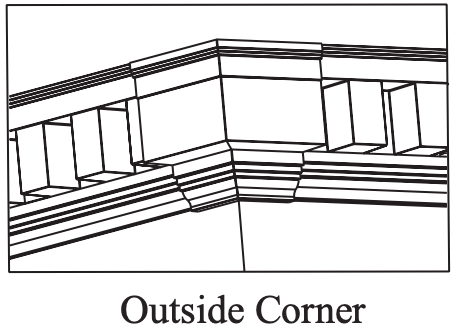
There are two different start points depending on which corner will be used. See step lA when starting with an Endcap or Inside Corner. See step 1B when starting with an Outside Corner.
Step 1A
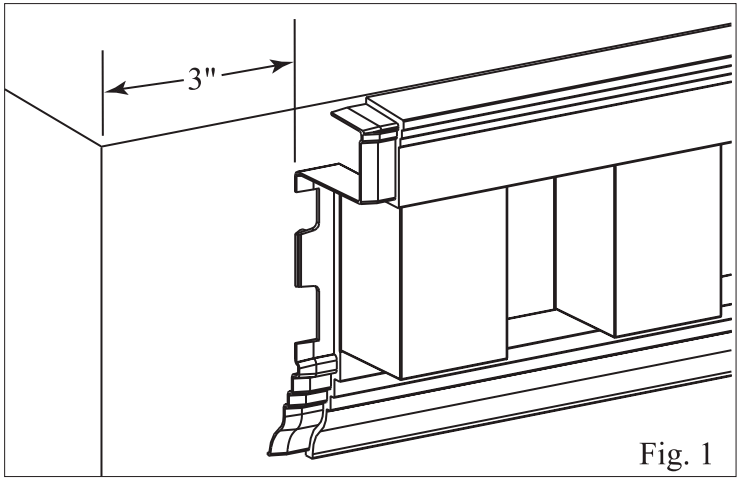
An Endcap is used when the Exterior Dentil will be terminated. An Inside Corner is used when continuing the Exterior Dentil around a 90 degree inside corner. Beginning at the point where the dentil will be terminated or carried around an inside corner, measure back 3" and place a mark on the wall. See Figure 1 at right. Place the Exterior Dentil at this mark and screw it into place using the screw pockets in the dentil. Be careful not to screw it too tight. The dentil needs freedom to expand and contract with temperature changes.
Step 1B
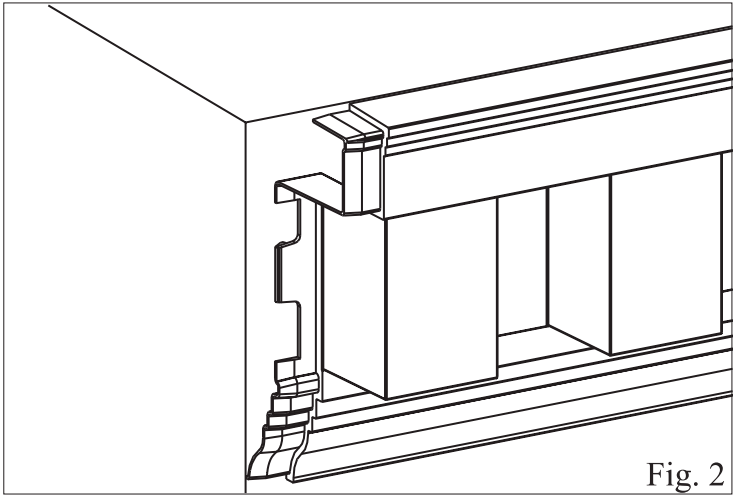
An Outside Corner is used when the Exterior Dentil will be continued around a 90 degree outside corner.
Place the Exterior Dentil flush with the corner of the house. Screw the dentil to the house using the screw pockets in the dentil. Be careful not to screw it too tight. The dentil needs freedom to expand and contract with temperature changes. See Figure 2.
Step 2
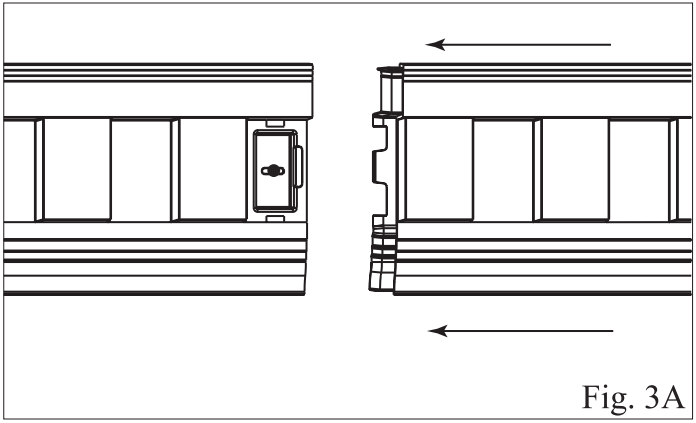
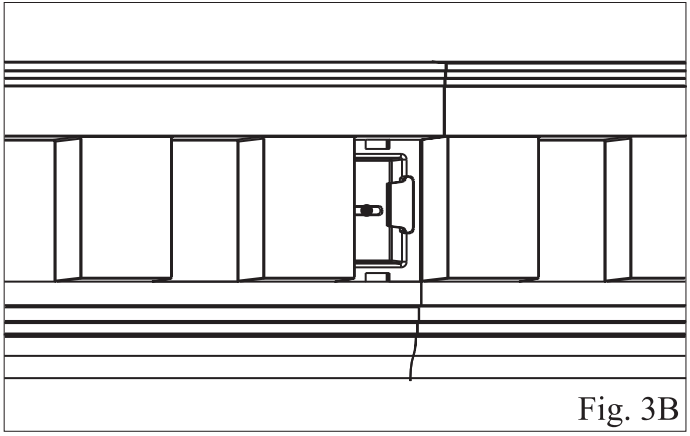
Once a starting point has been established, continue working from left to right along the walllocking the Exterior Dentil to one another. Screw them into place the same way as stated earlier. See Figures 3A and 3B at below.
Step 3
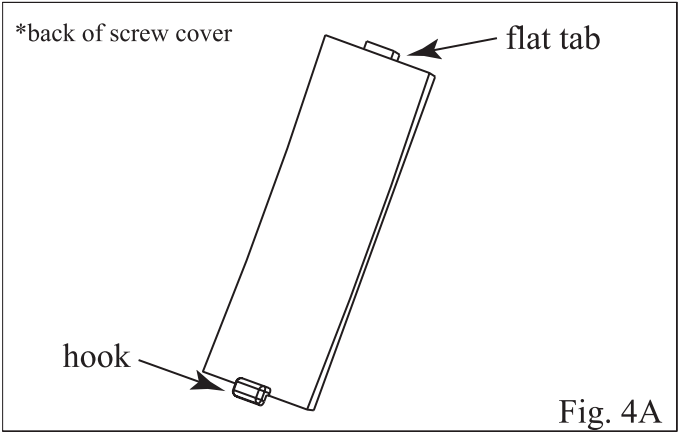
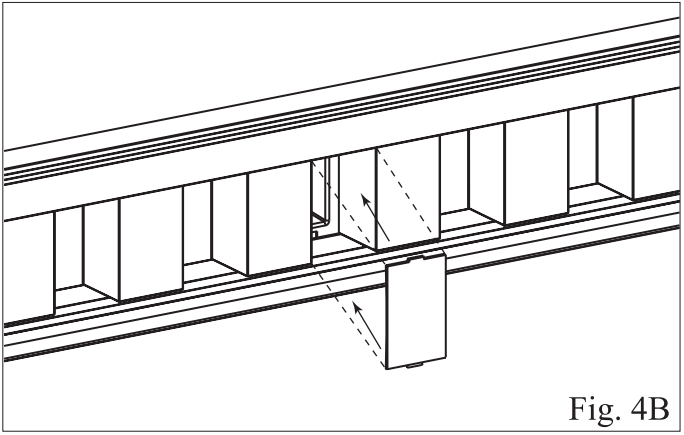
As each piece of dentil is screwed into place, the screw covers can be installed. To do this place the hook into the bottom of the dentil screw pocket first. Then push the flat tab into the top of the screw pocket until it is securely locked into place. See Figures 4A and 4B below.
Step 4
At the end of each wall the Exterior Dentil may need to be cut. Make sure when cutting the Exterior Dentil that you measure and cut from the right side.
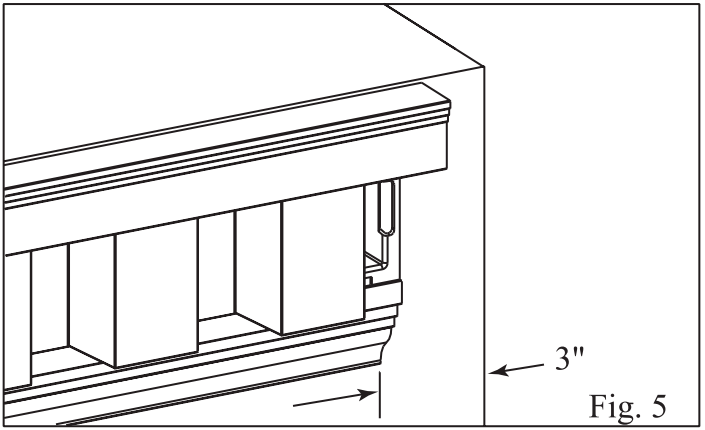
Note: When terminating with an Endcap, be sure the dentil ends 3" from the end of the wall. See Figure 5 at right.
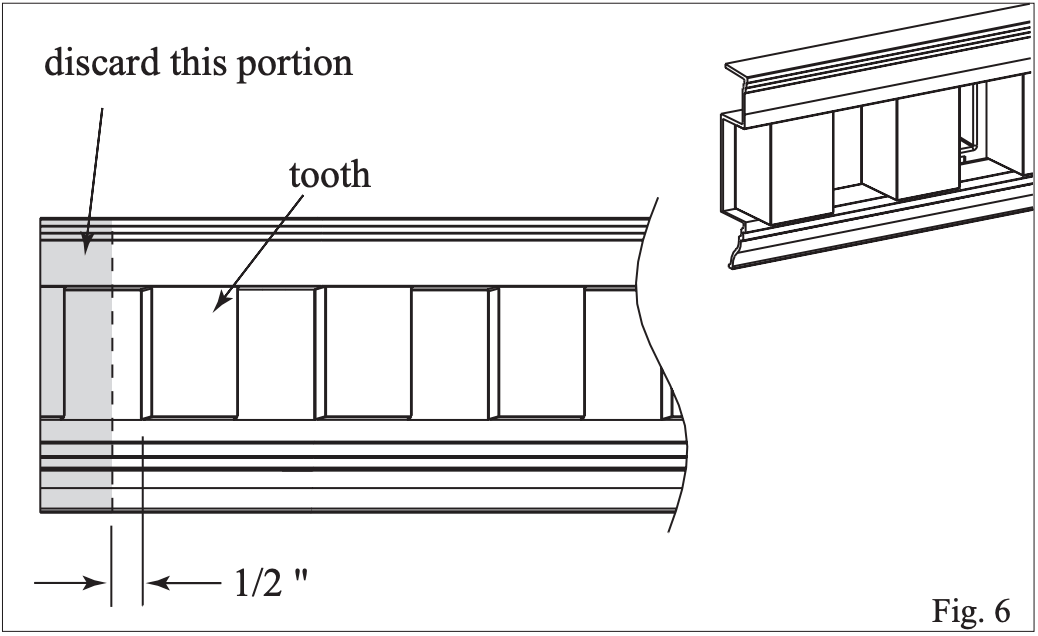
Step 5
When using a cut piece of dentil to continue with either an inside or outside corner, it may need to be trimmed. See Figure 6 right. Cutting the dentil at this 1/2" dimension will eliminate the need to modify the corner later.